Showing posts with label Games-Workshop. Show all posts

Saturday, March 30, 2024

Games-Workshop Lord of the Rings Terrain


These are a couple of old pieces of terrain from the original Games Workshop Lord of the Rings Strategy Battle Game. 

They've been sitting on the shelf for years and when I originally received my airbrush I used these as practice pieces for airbrushing. Starting with a black primer and then spraying dark grey, medium grey from a 3 and 9 position, and then a white from a 12 position - giving the models a shade through highlight. 

Then I put them back on the shelf until tonight when I stippled on some paint for the ground cover - using paints from Reaper - Stained Olive and Turf Green - added some Crimson Red and Pale Saffron (yellow) to add some flower cover.

Now I've got some interesting pieces to throw on the table.


Saturday, January 27, 2024

Games Workshop Tyranid Genestealer


I don't know why this miniature has been sitting on my desk or where it came from - I think it was originally part of the Tyranid vs Space Marine box from about 2005 - I had painted up a bunch of Tyranid Genestealers almost 20 years ago. There's probably a bunch more in a box on a shelf somewhere but I have no idea where at the moment - only this one. It would be good to find the others as I think this could be a fun set of models to use in a Dungeons and Dragons scenario.

When I was painting some hobgoblins (new post to come), I had some red, purple, and some blue/green. Those were the perfect colors for this Tyranid Genestealer.

It's been a long time since I've painted a model from Games Workshop but there's going to be a bunch more to come as Warhammer the Old World is out (sort of, we're still waiting for product) and we'll be painting Fantasy Warhammer real soon!

Sunday, September 01, 2013

Game's Workshop's Wraith 3


I absolutely love some of Game Workshop's older skeletons and wraiths that were sculpted pre-2000.  The old Vampire Counts models were a mixed bag in my opinion.  There were some models like the wights, necromancers, and banshees that just looked ridiculous - kinda like skeletons going to a Mardi-Gras.  There were other sculpts during the same time period that were just fantastic and I've wanted to pull into a Dungeons & Dragons game.

I have the Citadel Miniatures 2000 Annual that had all the GW miniatures in production at the time.  The Armoured Skeletons on the bottom of pages 336 are awesome and I've painted up skeleton 3 and skeleton 5.  Would love to get my hands on a few more such as sculpts 1, 2, and 4 and make a proper five piece unit out of them that I can drop on adventurers - they all have a bit of heavy armour (british spelling) and a bad-ass halberd to give out some damage.

In that same book a few pages later - page 343 to be exact - is a set of wraiths with a killer scythe.  My favorite of these has been wraith 3 and I picked him up as GW blister pack 8572G for $5.49 over a decade ago and he's been sitting on my shelf (last time I saw this figure at the GW store it was in the high teens - crazy prices for a single figure).  I love the flowing robes and the way the sculpt floats above the base - I've kinda had this Scooby-Doo vision in my mind of a ghostly wraith floating down the castle halls chasing intrepid adventurers to their doom.

Therefore, unlike similar Reaper models (skeleton/ghost with sword, skeleton ghost) I painted this up as vision of a blue ghost including the robes, head, and weapon.  I started with enchanted blue as the base color and kept adding skull white with each layer until I was satisfied that I had captured the right look.  I also tossed out the tiny base and put him on a GW one inch base with my standard dungeon look and the name "Harvester".

The Citadel book says the miniatures on page 343 were designed by Michael Perry and Trish Morrison - doesn't specify who did wraith 3.

Saturday, April 16, 2011

Games Workshop's Armoured Skeleton With Spear 5


Rainy days are good for something as I was able to paint up another awesome looking GW archive skeleton! Just as before, this skeleton from Games Workshop is circa pre-2000 - I've always liked the strong look of GW's armoured (british spelling) skeletons. Long ago I went to a GW Games Day in Baltimore and picked up some bits including shields with skeletons on them - I used one of these instead of the boring round plastic shield. I also tossed out the tiny base and mounted him on GW's one inch base - then gave it my standard dungeon look.

Painting Instructions for Armoured Skeleton With Spear 5:

Step 01: Undercoat model with black primer
Step 02: Use Vomit Brown on bones
Step 03: Mix Bleached Bone into Vomit Brown on bones
Step 04: Use Bleached Bone on bones as highlights
Step 05: Mix Skull White into Bleached Bone on bones as final highlights
Step 06: Use Snakebite Leather on leather armor
Step 07: Wash leather armor with Devlan Mud
Step 08: Use Terracotta on the halbred shaft
Step 09: Drybrush Blood Red on the halbred shaft
Step 10: Use Boltgun Metal on all armor, studs, and blade
Step 11: Wash all metal 1/4 Asurmen Blue, Devlan Mud, Chaos Black, Water
Step 12: Highlight all metal with Boltgun Metal
Step 13: Final highlight all metal with Chainmail
Step 14: Drybrush Codex Grey on base
Step 15: Drybrush Fortress Grey on base
Step 16: Drybrush final highlight Skull White on base

Sunday, September 19, 2010

Games Workshop's Armoured Skeleton With Spear 3


This skeleton from Games Workshop is circa pre-2000 - I've always liked the strong look of GW's armoured (british spelling) skeletons. Long ago I went to a GW Games Day in Baltimore and picked up some bits including shields with skeletons on them - I used one of these instead of the boring round plastic shield. I also tossed out the tiny base and mounted him on GW's one inch base - then gave it my standard dungeon look.

There's no drybrushing on this model - all painting was layered from dark to light colors including the metal. I used a copper color on the breastplate to ease the brightness of the silver scale armor.

Saturday, January 15, 2005

Games-Workshop's Tyranid Genestealers


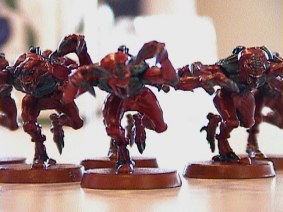
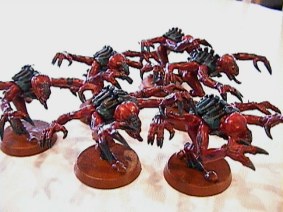
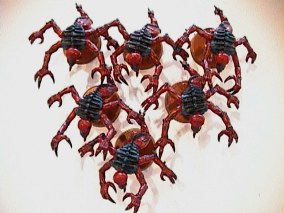
Tyranid Genestealers for Daniel's 40k game. These were a quick paint - we started out by spray painting the whole lot red. Then did a wash with Blood Red and a highlight drybrushing with Blazing Orange. Then painted all the skel structure with Chaos Black and drybrushed with Hawk Turquoise.

Saturday, January 17, 2004

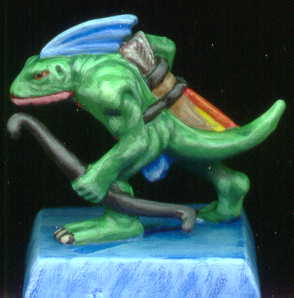
Games Workshop's Skink


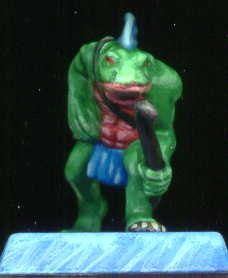
This Games Workshop Skink was painted with Reaper pro-paints as test.

I worked up a practice skink for teaching a paint class to kids using Reaper Pro-Paints. The base was a bit of fun copied from the house painter at Dream Wizards.

Painting Instructions for Skink (using Reaper Pro-Paints):
Step 01: Undercoat model with white primer
Step 02: Use Dragon Blue on fin and loincloth
Step 03: Use mix of Dragon White and Dragon Blue on fin and loincloth
Step 04: Use mix 2/3 Dragon White and 1/3 Dragon Blue on fin and loincloth
Step 05: Use mix 3/4 Dragon White and 1/4 Dragon Blue on fin and loincloth
Step 06: Use Kilt Green on body
Step 07: Use Emerald on body
Step 08: Use mix of 2/3 Emerald and 1/3 Dragon White
Step 09: Use mix of 1/2 Emerald and 1/2 Dragon White
Step 10: Use Blood Red on underbelly
Step 11: Use 1/2 Dragon White and 1/2 Blood Red on underbelly
Step 12: Use 2/3 Dragon White and 1/3 Blood Red on underbelly
Step 13: Use Woodland Brown on quiver
Step 14: Use mix of Dragon White and Woodland Brown on quiver
Step 15: Use Walnut on straps, bow, and toenails
Step 16: Use mix of Dragon White and Walnut on straps and bow
Step 17: Use Caucasion on toes

Saturday, January 10, 2004

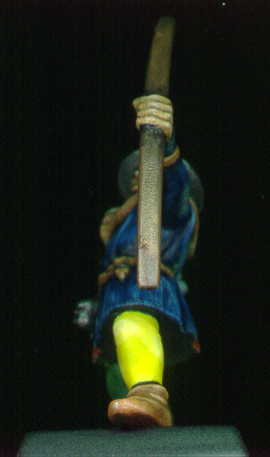
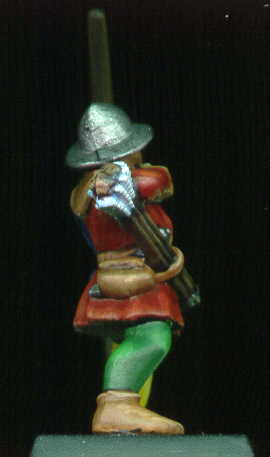
Games Workshop's Archer


The archer is a test using Reaper Pro-Paints for a class I'm teaching to elementary school age children. In the classroom we are using the paint-kits #1 & #2 by Reaper Miniatures.

I happened to have a bunch of Games Workshop Brettonian archers on the shelf which I picked up from e-bay cheap. So one of them became my study. I used 16 out of the 17 pots of Reaper paint in my possession.

Painting Instructions for Archer:
Step 01: Undercoat model with grey
Step 02: Use Dragon Black to outline all boundaries and metal
Step 03: Use Ruddy Flesh on face and hands
Step 04: Use watered down Flesh Wash on face and hands
Step 05: Use Caucasion as highlights on face and hands
Step 06: Used Oil Leather on all leather
Step 07: Use a wash of Walnut on all leather
Step 08: Used Oil Leather mixed with Caucasion on all leather
Step 09: Used more Caucasion into mix as highlights on all leather
Step 10: Use Breonne Navy on half of jacket
Step 11: Use mix of Breonne Navy and Dragon Blue on half of jacket
Step 12: Use Dragon Blue on jacket
Step 13: Use mix of Linen White and Dragon Blue as highlights on jacket
Step 14: Use Blood Red on half of jacket
Step 15: Use Firehawk on half of jacket
Step 16: Use mix of Sunlight and Firehawk on half of jacket
Step 17: Use Kilt Green on half of pants
Step 18: Use mix of Emerald and Kilt Green on half of pants
Step 19: Use more Emerald into mix as highlights on half of pants
Step 20: Use Sunlight on half of pants
Step 21: Use mix of Dragon White and Sunlight on half of pants
Step 22: Use more Dragon White into mix as highlights on half of pants
Step 23: Use Walnut on bow and arrow shafts
Step 24: Use mix of Woodland Brown and Walnut on bow and arrow shafts
Step 25: Use more Woodland Brown to mix on bow and arrow shafts
Step 26: Use Woodland Brown on bow and arrow shafts
Step 27: Use Linen White on arrow flights
Step 28: Use much watered down Dragon Blue on arrow flights
Step 29: Use Dragon White on arrow flights
Step 30: Use Truesilver on metal bits
Step 31: Use Dragon Black on base

Wednesday, June 18, 2003

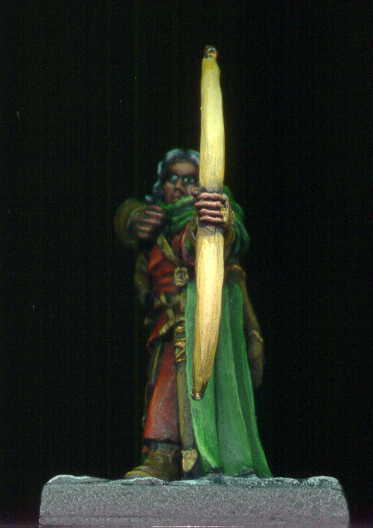
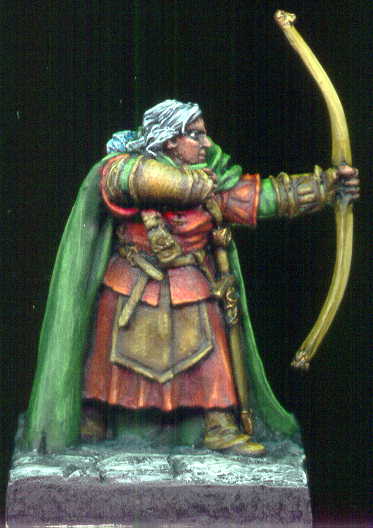
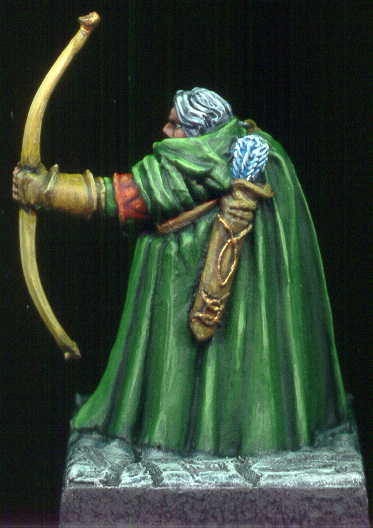
Games Workshop's Faragon Ranger


This is a Faragon Ranger model placed on a Reaper metal base for use in an rpg campaign.

Figure was painted using the layering techniques.

Painting Instructions for Games Workshop's Faragon Ranger:
Step 01: Use Chaos Black primer
Step 02: Use Dark Flesh for skin
Step 03: Use mix of Dark Flesh with Elf Flesh for skin for highlights
Step 04: Continue to add Elf Flesh to skin mix for final highlights
Step 05: Use mix of Chaos Black and Dark Angels Green on cloak
Step 06: Add more Dark Angels Green to mix on cloak
Step 07: Add Snot Green to mix on cloak but leave shadows
Step 08: Add Scorpion Green to mix on cloak and start highlights
Step 09: Add Bleached Bone to mix on cloak for final highlights
Step 10: Use Scab Red on clothes
Step 11: Use Red Gore on clothes - stay in shadows
Step 12: Use mix of Red Gore and Blood Red on clothes - start to highlight
Step 13: Use Blood Red on clothes - further highlighting
Step 14: Use mix of Blood Red and Golden Yellow - highlights
Step 15: Add more Golden Yellow and Bleached Bone to mix - final highlight
Step 16: Use Scorched Brown on leather
Step 17: Use Bestial Brown on leather
Step 18: Use Snakebite Leather on leather as highlights
Step 19: Use Bubonic Brown on leather as final highlights
Step 20: Use Snakebite Leather on bow
Step 21: Use Bubonic Brown on bow
Step 22: Use mix of Bubonic Brown and Bleached Bone as highlight on bow
Step 23: Use Bleached Bone as final highlight on bow
Step 24: Use Shining Gold on metal trim
Step 25: Use Codex Grey on arrow flights
Step 26: Drybrush Skull White on arrow flights
Step 27: Wash arrow flights with Sky Blue Ink
Step 28: Repeat drybrush of Skull White on arrow flights
Step 29: Use Shadow Grey on hair
Step 30: Drybrush Space Wolves Grey on hair
Step 31: Drybrush highlights on hair using Ghostly Grey
Step 32: Use Codex Grey on base
Step 33: Drybrush Fortress Grey on base
Step 34: Highligh drybrush Skull White on base

Sunday, November 17, 2002

Games-Workshop's Bretonnian Henchman


These four figures were painted in a single night for my warhammer skirmish battle board scenario - troll under the bridge. Not bad - mostly washes and dryrbrushing with a few highlight layers. Completed in November 2002.

Monday, September 16, 2002

Games-Workshop's River Troll #1


This is the first river troll painted for the skirmish scenario - under the bridge. This model was actually a blast to paint - a big ol' nasty troll!

The painting technique used was layering up from dark angels green to bilious green mixed with white. Quite a dramatic change.

The first four views show the traditional front, side, rear views. The two below are a first layer wash base which I posted to the DC area mini-painting group as a bit of discussion regarding good enough to game with versus the pure artistic painting. Essentially this was the foundation and the discussion surrounds is the foundation good enough for the gaming board - if the foundation takes 20 percent of the effort do players really need another 80 percent to fill in all the details when your looking at a game from 3 to 10 feet away?


Finished in September 2002.

Painting Instructions for River Troll 1

Step 1: Undercoat model with White Primer
Step 2: Use Chaos Black on hairy bits and scale
Step 3: Use slight watered down Dark Angels Green on all skin and scale
Step 4: Use Hawk Turquoise on hairy bits
Step 5: Use watered down Chaos Black over hairy bits - repeat Step 4 where needed
Step 6: Use Scab Red on all bony protusions, nails, tongue, and eyes
Step 7: Use Scorched Brown on log club
Step 8: Use watered down Flesh Wash on teeth
Step 9: Drybrush Snot Green on scale
Step 10: Use Snot Green on all skin
Step 11: Use Red Gore on all bony protusions, nails, and eyes
Step 12: Use Warlock Purple on tongue
Step 13: Use Tentacle Pink and blend into Warlock Purple to highlight tongue
Step 14: Use slightly watered down Scorpion Green on all skin - start to highlight
Step 15: Repeat 14 for bolder highlighting areas
Step 16: Use Blood Red on all bony protusions, nails, and eyes
Step 17: Drybrush Bestial Brown on log club
Step 18: Drybrush Snakebite Leather on log club
Step 19: Drybrush Vomit Brown on log club
Step 20: Very light drybrush of Bleached Bone on highlight of log club
Step 21: Use half 60/40 mix of Bilious Green and Scorpion Green on all skin - continue to highlight
Step 22: Use Bilious Green on all skin for highlight
Step 23: Use Bilios Green and Skull White for final skin highlight
Step 24: Use mix of Hawk Turquoise and Skull White for drybrush on hairy bits
Step 25: Use Bleached Bone on teeth
Step 26: Use mix of Bleached Bone and Skull White to highlight teeth
Step 27: Use Skull White as final highlight on teeth
Step 28: Use Skull White, Fortress Grey, and Chaos Black on toothy spikes on club

Sunday, December 09, 2001

Games-Workshop's Dwarf


The dwarf was an interesting experiment in drybrushing as he's mostly hair, feathers, chain armor, and metal. When I drybrushed, the paint was a bit watered down to be more precise. The cloak on the back was blended starting with the medium blue and working down and then up the color scale. The axe handle shows that I need to learn how to make a wood texture when there is none in the mini. Finished in December of 2001.

Painting Instructions for Warhammer Quest Dwarf

Step 1: Undercoat model with White Primer
Step 2: Use Dwarf flesh on face
Step 3: Use Chaos Black on base, steel, beard, and helm feathers
Step 4: Use Scorched Brown on axe handlesword handle, sheeth, and pouch
Step 5: Use Enchanted Blue on cloack
Step 6: Use Golden Yellow on gloves
Step 7: Use mix of Dwarf Flesh and Elf Flesh on cheeks and nose
Step 8: Drybrush Codex Grey on beard and wings
Step 9: Drybrush Fortress Grey on beard and very lightly on wings
Step 10: Drybrush Skull White on beard and extremely lightly on top part of wings
Step 11: Wash beard with Chaos Black
Step 12: Re-drybrush beard lightly with Skull White
Step 13: Use Chainmail on all metal bits
Step 14: Use Mithril Silver on highlights of axe
Step 15: Use Shining Gold on all edges of metal highlights
Step 16: Use watered down Flesh Wash on all metal
Step 17: Use Dark Angels Green on cloth between hands and armor
Step 18: Use a Flesh Wash on the gloves - getting into grooves between fingers
Step 19: Use Golden Yellow on gloves
Step 20: Use Sunburst Yellow on gloves - sides and top
Step 21: Use Bad Moon Yellow on gloves - top
Step 22: Mix Bad Moon Yellow and Skull White - use to highlight gloves
Step 23: Add more Skull White to mix and finish highlights on gloves
Step 24: Add continued highlights on all Scorched Brown of Bestial Brown, Snakebite Leather, Bubonic Brown, and then Bleached Bone
Step 25: Use slightly watered down Snakebite Leather on top of markings in axe shaft
Step 26: Use Chaos Black with a drop of Codex Grey on boots - continue to add drop of Codex Grey - highlight final with Codex Grey
Step 27: Water down Chaos Black and wash over boots dulling the highlights
Step 28: Blend down to Regal Blue and up to Lightning Blue on cloak
Step 29: Drybrush stone base with Shadow Grey, Space Wolves Grey, and then final highlight of Ghostly Grey

Wednesday, November 21, 2001

Games-Workshop's Lahmian Vampire


This figure represents some new painting and basing techniques for me. Originally purchased for the Chick Challenge II - I didn't have time, but I did challenge myself with a new technique. This was done following the White Dwarf - Painting with the Average Joe article. What's different is that I started from dark to light and overlapped the paint instead of blending. Normally I start in the middle and blend down then up. Completed in November of 2001.

Painting Instructions for Lahmian Vampire:

Step 01: See White Dwarf 257
Step 02: Undercoat model with white primer
Step 03: Use Scorched Brown on the three skulls
Step 04: Use Chaos Black on trim and metal
Step 05: Use Dark Angels Green on dress
Step 06: Use mix of Dark Flesh and Elf Flesh on skin
Step 07: Use Scab Red on shoes and snake
Step 08: Use mix of Dark Angels Green and Snot Green on dress
Step 09: Use a bit more Elf Flesh in the mix of Dark Flesh on skin
Step 10: Use mix of Scab Red and Blood Red on shoes and snake
Step 11: Use Snakebite Leather on the three skulls
Step 12: Use Snot Green on dress
Step 13: Use Blood Red on shoes and snake
Step 14: Use a bit more Elf Flesh in mix of Dark Flesh on skin
Step 15: Use Bubonic Brown on the three skulls
Step 16: Use Burnished Gold on metal bits
Step 17: Use mix of Chaos Black and Fortress Grey for black highlights
Step 18: Use mix of Snot Green and Sunburst Yellow to highlight dress
Step 19: Wash metal bits with watered down brown ink
Step 20: Use Snakebite Leather and Bleached Bone on teeth
Step 21: Eyes - paint black and then dot on either side
Step 22: Use mix of Fiery Orange and Blood Red for final highlights on shoes and snake
Step 23: Use Pallid Flesh into skin mix for final highlights
Step 24: Use Shining Gold as highlight to metal bits
Step 25: Use mix of Shining Gold and Mithril Silver for final metal bits highlight
Step 26: Use thinned down Scab Red on lower lip
Step 27: Use Goblin Green on base

Sunday, September 02, 2001

Games-Workshop's Wizard


The wizard really turned out well for me. It was my first attempt at making a white cloak and using shades of grey to blend. I also used a very light wash of blue over the white. The gems on this model are getting better but there is still lots of room for improvement. Finished in September of 2001.

Painting Instructions for Warhammer Quest Wizard

Step 1: Undercoat model with White Primer
Step 2: Use Bronzed Flesh on skin
Step 3: Use Chaos Black on base, beard, and metal
Step 4: Use Enchanted blue on cape
Step 5: Use Blood Red on shoes, scarf, staff
Step 6: Use Fortress Grey on cloak
Step 7: Use Snakebite leather on belt, pouch, scrolls
Step 8: Use Snot Green on gems and potion bottle
Step 9: Use Sunburst Yellow on bottom of scarf - flames
Step 10: Blend Scab Red thru Golden Yellow on sword
Step 11: Drybrush Tin Bitz, Shining Gold, then Burnished Gold on staff and sword
Step 12: Blend various mix of Fortres Grey to Skull White on robes
Step 13: Wash robes with watered down Ice Blue
Step 14: Blend Cape from Regal Blue to Ice Blue
Step 15: Drybrush Codex Grey to Skull White on beard
Step 16: Blend Blood Red bits from Scab Red to Fiery Orange
Step 17: Finish Blood Red bits with highlight of Golden Yellow
Step 18: Highlight Yellow Flames with Bad Moon Yellow and Skull White
Step 19: Shade and highlight the green bag and gems with Dark Angels Green to Bilious Green
Step 20: Highlight hat with mix of Chaos Black and Codex Grey, then highlight with Codex Grey
Step 21: Shade flesh with Vermin Brown mixing with Bronzed Flesh and highlighting with Elf Flesh
Step 22: Drybrush base with Codex Grey and Fortress Grey

Sunday, July 15, 2001

Games-Workshop's Warrior


The warrior was an interesting project. There's a lot I like about him and there's a bit I'm not satisfied with. The mouth in particular - should have done something to darken the expression but I struggled with it a couple of times and gave up. The body tones, blending the blues and reds, the drybrushing all came out rather well. Finished in July of 2001.

Painting Instructions for Warhammer Quest Warrior

Step 1: Undercoat model with White Primer
Step 2: Use Bronzed Flesh on skin
Step 3: Use Scorched Brown on boot and bear skin
Step 4: Use Blood Red on inside of bear skin
Step 5: Use Snakebite Leather on hair - water down a bit
Step 6: Use Enchanted Blue on loincloth and cuffs
Step 7: Use Chaos Black on all metal bits and bear claws
Step 8: Drybrush Chainmail on all metal bits
Step 9: Highlight drybrush Mithril Silver on sword
Step 10: Wash sword with Enchanted Blue
Step 11: Use Vomit Brown on bear claws
Step 12: Highlight bear claws with Bleached Bone
Step 13: Use Bleached Bone on teeth
Step 14: Drybrush Blood Red on skulls
Step 15: Drybrush bear fur with Bestial Brown, Snakebite Leather, Bubonic Brown, and Bleached Bone
Step 16: Blend inside bear skin from Scab Red to Blood Red
Step 17: Use Bubonic Brown on boot knife
Step 18: Highlight hair with Leprous Brown
Step 19: Use Vermin Brown on fur of boot
Step 20: Drybrush Leprous Brown on fur of boot
Step 21: Drybrush mix of Leprous Brown and Bleached Bone on fur of boot
Step 22: Highlight boot using Bestial Brown to Bubonic Brown
Step 23: Blend blue areas from Enchanted Blue to Lightning Blue with Ice Blue Highlights
Step 24: Blend Vermin Brown, Bronzed Flesh, and Elf Flesh on skin
Step 25: Use Chaos Black on base
Step 26: Drybrush base with Shadow Grey to Ghostly Grey