
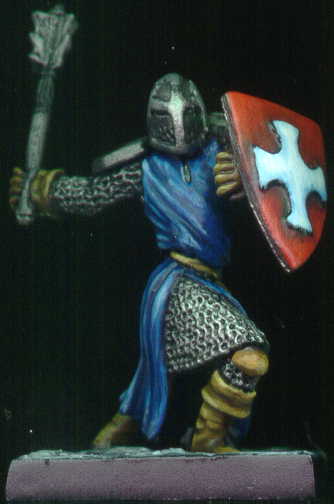

I finally managed to find some time to paint again. I chose to paint the templar knight because I had already done a similar templar knight from Reaper and could replicate the look while using the first miniature as a guide. I figured doing so would be the easiest way to remember once again how to paint.
I use GW's paints and have always taken good care of them. I've never been away from painting for the amount of time as current and knowing GW's reputation for dried paint due to caps with a faulty design; I was a bit worried. Good news and bad news - I did lose 2 paints - Scab Red and Bestial Brown. However, most of the others all made it through the drought alright. The best were GW's newly designed caps - right before my last stopping point GW had re-released their paints with the new cap design. Those paints made it through looking like day one from the hobby store.
Painting Instructions for Templar Knight:
Step 01: Undercoat model with Black primer
Step 02: Drybrush Boltgun Metal on all chainmail and metal bits
Step 03: Use Regal Blue on robes
Step 04: Use mix of Regal Blus and Ultramarines Blue on robes
Step 05: Use Ultramarines Blue on robes
Step 06: Use mix of Ultramarines Blue and Lightning Blue on robes
Step 07: Use Lightning Blue on robes
Step 08: Use Ice Blue on robes
Step 09: Use Skull White on robes
Step 10: Use Scab Red on shield
Step 11: Use Red Gore on shield
Step 12: Use Blood Red on shield
Step 13: Use Blazing Orange on shield
Step 14: Use Ice Blue on cross on shield
Step 15: Use mix of Ice Blue and Skull White on cross on shield
Step 16: Use Skull White on cross on shield
Step 17: Use Scorched Brown on leather bits
Step 18: Use Bestial Brown on leather bits
Step 19: Use Snakebite Leather on leather bits
Step 20: Use Buboninc Brown on leather bits
Step 21: Use mix of Bubonic Brown and Bleached Bone on leather bits
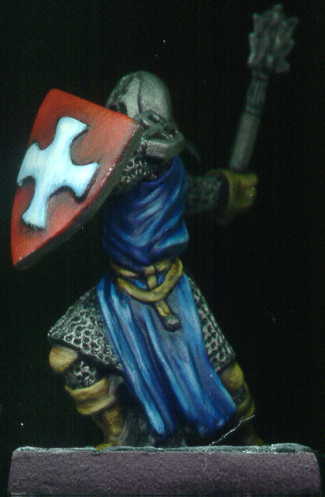
Step 22: Use Scorched Brown on back of shield
Step 23: Use Bestial Brown to make vertical lines on back of shield
Step 24: Use Vomit Brown to make vertical lines on back of shield
Step 25: Use Bleached Bone to make vertical line on back of shield
Step 26: Use Boltgun Metal around outside of and small line around back of shield
Step 27: Use Tin Bitz on sword pommel
Step 28: Mix Tin Bitx and Boltgun Metal for highlights on sword pommel
Step 29: Use Chainmail on metal highlights
Step 30: Use Mithril Silver as final metal highlights
Step 31: Drybrush Codex Grey on stone
Step 32: Drybrush Fortress Grey on stone
Step 33: Drybrush Skull White on stone
No comments:
Post a Comment