

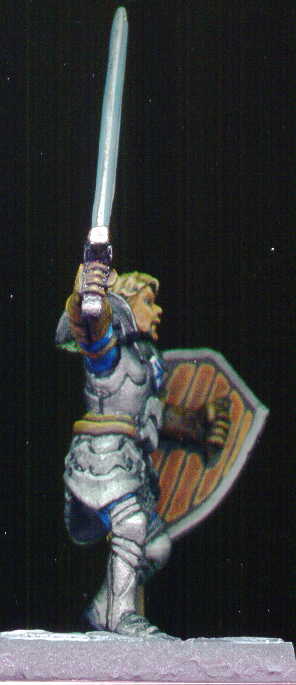

Sparrowhawk the Paladin was a fig I picked after we kept bumping into a mighty Paladin in our local rpg. This was a quick paint for the game table. Time on this was about 6 hours during a night between travel for work and vacation. The metals were watered down and painted in layered highlights, just like any other paint. The back of the shield used the same technique as Windrunner the elf - above. The sword was an interesting experiment of mixing a color with a metallic. I wanted the sword to be brighter to give it a mystical appearance - the inner part was skull white with mithril silver and the outer parts was lightning blue with mithril silver. Then I did a wash of mithril silver to give it a shine. I'm somewhere between hating it and liking it and can't make up my mind if it works or not. The attempt was to give the idea it was a magic sword with it's own properties (a glow of white to blue to match the Paladin's colors) without going overboard.
Painting Instructions for Reaper Miniature's Sparrowhawk:
Step 01: Undercoat model with black primer
Step 02: Use Boltgun Metal - watered down then brush wiped
Step 03: Use Shadow Grey on shield
Step 04: Use Space Wolved Grey on shield
Step 05: Use Ghostly Grey on shield
Step 06: Use Skull White on shield as final highlight
Step 07: Use Midnight Blue on clothes and shield design
Step 08: Use Regal Blue on clothes and shield design
Step 09: Use Enhanted Blue on clothes and shield design
Step 10: Use Lightning Blue on clothes and shield design
Step 11: Use Ice Blue on clothes and shield design
Step 12: Use Scorched Brown on leather
Step 13: Use Bestial Brown on leather
Step 14: Use Snakebite Leather on leather
Step 15: Use Bubonic Brown on leather as final highlight
Step 16: Try something new - mix Skull White with Mithril Silver - inner sword
Step 17: Try something new - mix Lightning Blue with Mithril Silver - outer sword
Step 18: Use Mithril Silver - as a wash on sword
Step 19: Use Mithril Silver watered down as highlight on plate armor
Step 20: Use Dark Flesh on hair
Step 21: Drybrush Leprous Brown on hair
Step 22: Add Pallid Flesh to mix and drybrush on hair
Step 23: Add more Pallid Flesh on hair and drybrush - keep doing
Step 24: Use Bronzed Flesh on face
Step 25: Use watered down Flesh Wash on face
Step 26: Use Elf Flesh on face as highlights
Step 27: Use thick line of Vomit Brown on back of shield
Step 28: Use thin line of Bestial Brown on back of shield
Step 29: Use Chaos Black on base
Step 30: Drybrush Codex Grey on base
Step 31: Drybrush Fortress Grey on base
Step 32: Drybrush Skull White on base
No comments:
Post a Comment