Welcome to a display of painted miniatures by Rick. Each entry has an explanation to the figure and the "step by step" instructions. Enjoy!
Showing posts with label Bob Olley. Show all posts
Friday, April 26, 2019
Reaper Miniatures Brass Bull - 77256
This is a fantastic sculpt by Bob Olley and Kevin Williams of the "brass bull" - what's historically called a Gorgon in Dungeons and Dragons which many would say misrepresents - the Gorgon in greek mythology is a female with snakes for hair and can turn those who gazed upon her into stone with Medusa being the most famous of the three sisters. How Gary Gygax made the leap to a bull whose breath turns creatures to stone is a bit of a stretch - the concept is cool, but something other than Gorgon name would have been great.
Bad name or not, this is a really cool model and another great utilization of the bones product line - retails for $5.99 while the metal version is quite the hunk and has a hunky price tag of $18.99. The size of this model is such that there is little detail loss - in fact, without picking it up it would be extremely difficult to tell the bones from the metal. These larger monster models is where bones really shines and shows off its value to the gamer.
This was fun and easy to paint - just some metallic drybrushing over a dark blue basecoat - doesn't get easier than that.
Painting instructions for Brass Bull / Gorgon (used my Vallejo Game Color)...
Step 1: I'm using Stynylrez primer on the bones models - just slop it on and cover everything - it works great!
Step 2: Use Night Blue as a basecoat over the entire model
Step 3: Drybrush with Gunmetal Metal
Step 4: Drybrush highlights with Chainmail Silver
This is a bones model out of the kickstarter pile - so up goes the count...
Kickstarter paint total: 120 + 1 Bull = 121
Wednesday, May 23, 2018
Reaper Miniatures Altar of Evil - 77139
Those were the original pictures that I was going to show. But then... I went to Reaper Miniature's website to view the model number and sculptor. They have two very well painted versions - one using the concept of a red curtain between the pillars and the other using the concept of stained glass between the pillars. Both very cool ideas! I figured the red curtains would go extremely well with my idea of having a red cloth on the top of the table. So.....
There is my "new" altar of evil which I absolutely love the added color. This is going to be extremely inspiring on our upcoming adventure. Yes, we have an upcoming scenario with the cliche trope of a damsel in distress about to be sacrificed at the altar of evil - but hey, it's classic and it's going to be super awesome with this new piece of terrain.
I put the altar on a two-inch square base and then molded in the one-inch tile markers. My evil wizard will be on one and I'll have the damsel on the sacrificial cloth as the heroic adventurers come in just in time to save the innocent. Of course, they'll have battled some ghouls, ghasts, and various skeletal undead to get to the final battle. It's going to be a great night of fun!
Beyond the crafting, the actual painting was simple. Reaper's Field Grey is a grey with a touch of green mixed in and that was drybrushed on the altar - a final drybrush was made by adding some Solid White. The tablecloth and curtains were Vallejo's Scarlett Red with some Bloody Red at the bottom for highlights. The skulls were Vallejo's Bonewhite with a highlight of Skull White. The base was a progressive drybrushing of Vallejo's Cold Grey, Stonewall Grey, and Skull White.
Kickstarter paint total: 101 + 1 Altar of Evil = 102
Monday, November 13, 2017
Reaper Miniatures Stirges - 2691


Back to the metal - I needed a couple of stirges and I like these models sculpted by Bob Olley - come two to the package.
The stirges were a pretty simple paint job - I covered the entire model with Scarlett Red. Mixed a bit of Scarlett Red with black for the shading. Mixed a bit of Scarlett Red with Bloody Red for the highlights. Finished off the final highlights with Bloody Red on its own. The beak/stinger is a blend of Orange Fire, Moon Yellow, and Skull White. Straight up Black on the eye and claws. The hooks on the wings were a blend of Filthy Brown to Bone White. The tail was hit with Parasite Brown and highlighted with Scrofulous Brown.
The stalagmite was done using reds to yellow to white using the same schema as my Stone Lurker. The anemic stick was Parasite Brown, washed with Devlan Mud, and highlighted with Filthy Brown.
Saturday, August 05, 2017
Reaper Miniature's Stone Lurker - 2658


This is a fantastic model sculpted by Bob Olley called a Stone Lurker - aka Roper in D&D terminology. What's really interesting is that a Yochlol has a description that fits almost exactly the same description as a Roper - with the only difference being a Yochlol technically doesn't have a mouth in that form.
I recently ran the Twilight Tomb - 3rd level module which had a Yochlol with 2 levels of sorcerer. A Yochlol can move between a humanoid form, large spider form, it's natural form (looks like a Roper but with 8 tentacles), and a gaseous form. Started the encounter in human form, then moved to large spider form, then put down this model as the final boss battle form. I used the spider bite (without poison) as well as its 8 tentacles in its natural form and the encounter worked out well for a group of five 4th level characters and fits the imagination of the model better.
Painting instructions for Stone Lurker:
Step 1: Undercoat model with black primer (back to metal so I used the spray primer)
Step 2: Used Liche Purple on the tops of the tentacles
Step 3: Used Tentacle Pink on the bottoms of the tentacles
Step 4: Drybrushed Warlock Purple on the tops of the tentacles
Step 5: Washed the bottoms of the tentacles with Warlock Purple
Step 6: Highlighted just a bit where needed the suckers with Tentacle Pink mixed with just a bit of Skull White
Step 7: Used Red Gore as a basecoat on the main structure of the model and watered down a bit to extend the Red Gore onto the tentacles
Step 8: Used Blood Red on the main structure and a bit less on the tentacles
Step 9: Used Blazing Orange on the main structure and a bit less on the tentacles
Step 10: Used Golden Yellow on the main structure and a bit less on the tentacles
Step 11: Used Sunburst Yellow on the main structure and a bit less on the tentacles
Step 12: Used mix of Sunburst Yellow and Skull White on main structure for final highlights
Step 13: Used mix of Sunburst Yellow and Skull White as a drybrush on the teeth and eye
Step 14: Used Liche Purple for eye
Step 15: Drybrush Codex Grey on base
Step 16: Drybrush Fortress Grey on base
Step 17: Drybrush Skull White on base
Step 18: Use Chaos Black on sides of base
Monday, November 11, 2013
Reaper's Skeletal Dragon - 2705
Back to the metal! While the plastics are a great choice for inexpensive miniatures, there's just nothing like pulling out the heavy metal and rocking the gaming board. This is Reaper Miniatures' Skeletal Dragon sculpted by Bob Olley. A fantastic sculpt and a dragon that I just can't wait to animate on a group of "up to no good" heroes.
Painting instructions for Skeletal Dragon (Draco Osseus):
Step 01: Undercoat model with black primer
Step 02: Use Vomit Brown on all the bones
Step 03: Wash with Sepia ink (from Vallejo)
Step 04: Drybrush bones with Vomit Brown
Step 05: Drybrush bones with Bleached Bone
Step 06: Drybrush bones with Skull White hightlights
Step 07: Use Desert Yellow on wings
Step 08: Wash wings with watered down Graveyard Earth
Step 09: Drybrush wings with Rotting Flesh
Step 10: Drybrush base with Codex Grey
Step 11: Drybrush base with Fortress Grey
Step 12: Drybrush base with Skull White highlights
Saturday, January 15, 2005
Reaper's Orcs - 6061


More Orcs! Everyone needs more orcs to brighten their day and I thought it would be a good idea to start the year out right by finishing off the orcs sitting on my shelf! Finished in January 2005.
Painting Instructions for Various Reaper Orcs
Step 01: Undercoat models with black primer
Step 02: Use Boltgun Metal on all metal bits
Step 03: Mix some Flesh Wash (2x), a bit of Red Ink a bit of Yellow Ink onto metal bits as a rust affect
Step 04: Lightly drybrush Boltgun Metal on all metal bits
Step 05: Use Dark Flesh on skin
Step 06: Use Vermin Brown to highlight skin
Step 07: Use Leprous Brown as final highlight on skin
Step 08: Use Scorched Brown on wood (including back of shields)
Step 09: Use Bestial Brown as drybrush on wood (line back of shields)
Step 10: Use Vomit Brown as drybrush on wood (highlight line back of shields)
Step 11: Use very light drybrush of Bleached Bone on wood
Step 12: Wash drybrush with Bestial Brown
Step 13: Use Snakebite Leather on leather (leave black lines)
Step 14: Use Bubonic Brown as heavy highlight on leather
Step 15: Use Scab Red on shield
Step 16: Highlight shield with Blood Red
Step 17: Use Boltgun Metal on metal bits of shield
Step 18: Use Chaos Black on sides of base and rocks
Step 19: Drybrush Codex Grey on rocks
Step 20: Drybrush Fortress Grey on rocks
Step 21: Drybrush Skull White on rocks
Wednesday, February 04, 2004
Reaper's Orcs - 6061


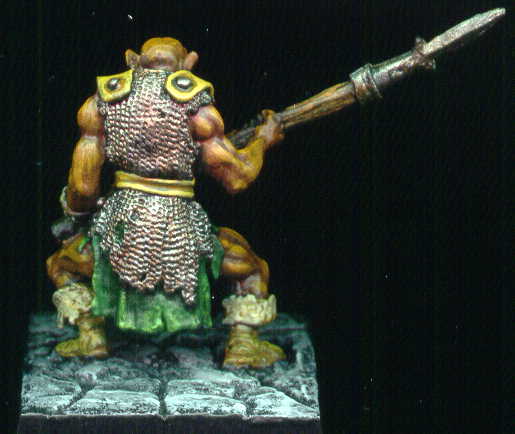
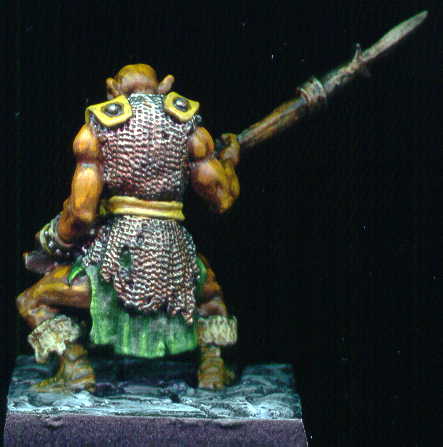
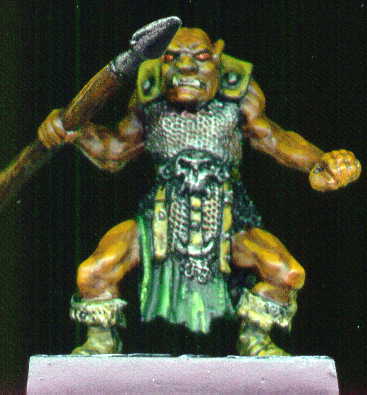
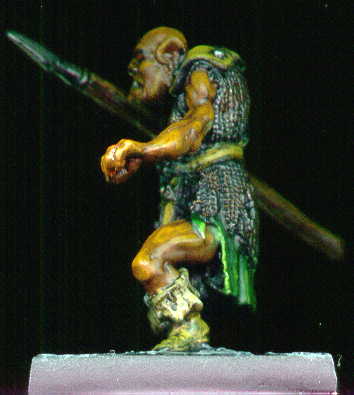
The following 2 models are from a 4 pack of orcs with spears produced by Reaper. Both had their spears in an upright position and their free hand by the knee. I did some bending and twisting to give it a bit of a dynamic look as long as one doesn't look too close.
The second model's spear makes it difficult to scan a right side - so no luck.
Finished February 2004.
Painting Instructions for Various Reaper Orcs
Step 01: Undercoat models with black primer
Step 02: Use Boltgun Metal on all metal bits
Step 03: Mix some Flesh Wash (2x), a bit of Red Ink a bit of Yellow Ink onto metal bits as a rust affect
Step 04: Lightly drybrush Boltgun Metal on all metal bits
Step 05: Use Dark Flesh on skin
Step 06: Use Vermin Brown to highlight skin
Step 07: Use Leprous Brown as final highlight on skin
Step 08: Use Scorched Brown on wood (including back of shields)
Step 09: Use Bestial Brown as drybrush on wood (line back of shields)
Step 10: Use Vomit Brown as drybrush on wood (highlight line back of shields)
Step 11: Use very light drybrush of Bleached Bone on wood
Step 12: Wash drybrush with Bestial Brown
Step 13: Use Snakebite Leather on leather (leave black lines)
Step 14: Use Bubonic Brown as heavy highlight on leather
Step 15: Use Scab Red on shield
Step 16: Highlight shield with Blood Red
Step 17: Use Boltgun Metal on metal bits of shield
Step 18: Use Chaos Black on sides of base and rocks
Step 19: Drybrush Codex Grey on rocks
Step 20: Drybrush Fortress Grey on rocks
Step 21: Drybrush Skull White on rocks
Sunday, December 08, 2002
Reaper's Golgath, Eradicator - 2270


Golgoth, Eradicator was a Reaper done as a bones project for our DC area painting group. This figure was a blast to paint - the bones were cool and the robe allows for some real shading and highlighting techniques.
There were a couple of firsts for this project. First time that I used the pastel colors in my paint tray on a massive scale. And the first time that I ever used a color wheel to coordinate colors - the red-violet robe started out the project and therefore used a blue-green and a yellow-orange according to the color wheel triad.
The technique used to paint was once again a layering - whereby I would use a color and keep moving up the scale, applying a lighter color on top of the darker color.
Painting Instructions for Golgoth, Eradicator
Step 1: Undercoat model with Chaos Black
Step 2: Use Nauseating Blue on cape
Step 3: Use Liche Purple on cape
Step 4: Use Warlock Purple on cape - start highlighting
Step 5: Use Tentacle Pink on cape as highlights
Step 6: Mix Skull White and Tentacle Pink - continue until final highlights
Step 7: Use Scaly Green on tattered clothing
Step 8: Mix Vile Green into Scaly Green on tattered clothing
Step 9: Continue to add Vile Green on tattered clothing - start highlights
Step 10: Mix Skull White to Vile Green on tattered clothing for highlights
Step 11: Continue to add Skull White for tattered clothing final highlights
Step 12: Use Vomit Brown on bones
Step 13: Mix Bleached Bone into Vomit Brown on bones
Step 14: Use Bleached Bone on bones as highlights
Step 15: Mix Skull White into Bleached Bone on bones as final highlights
Step 16: Use Leprous Brown on gloves and boots
Step 17: Mix Golden Yellow into Leprous Brown on gloves and boots as highlights
Step 18: Mix more Golden Yellow into Leprous Brown on gloves and boots as highlights
Step 19: Mix Skull White into Golden Yellow/Leprous Brown on gloves and boots as final highlights
Step 20: Use Scorched Brown on shield and leather bits
Step 21: Use Bestial Brown on shield and leather bits
Step 22: Use Snakebite Leather as highlights on shield and leather bits
Step 23: Use Vomit Brown as final highlights on shield and leather bits
Step 24: Use Bleached Bone then wash with Vomit Brown as final highlights on leather bits
Step 25: Use Boltgun Metal on all metal bits
Step 26: Use Tin Bitz on helm and shield decoration
Step 27: Use Chainmail to highlight metal
Step 28: Use Brazen Brass to highlight helm decoration
Step 29: Use Mithril Silver as final highlight to metal
Saturday, August 24, 2002
Reaper's Orc Warrior of Kargir - 2287


The Orc Warrior of Kargir is one of the coolest orc figures - not just Reaper, but everyone else's as well. Finished in August of 2002. This one sat on my desk for a while as I decided on color scheme. I wanted dark and moody - so I went with two different tones of brown - one for the skin and the other for the leather. Again, this figure was painted with the layering technique.
Painting Instructions for Orc Warrior
Step 1: Undercoat model with White Primer
Step 2: Use Chaos Black on chainmail and bag
Step 3: Use Dark Angels Green on tattered cloth
Step 4: Use Dark Flesh on skin
Step 5: Use Scorched Brown on leather
Step 6: Use Chaos Black on metal bits on leather
Step 7: Use Bestial Brown on leather
Step 8: Use Snakebite Leather on leather
Step 9: Use mix of Snakebite Leather and Bubonic Brown as highlight on leather
Step 10: Use Bubonic Brown as final highlight on leather
Step 11: Very light drybrushing of Bleached Bone
Step 12: Use Chestnut Ink on chain mail and teeth
Step 13: Use Boltgun Metal on chain mail and spiky metal bits
Step 14: Use Flesh Wash on shield
Step 15: Use watered down Flesh wash on spiky metal bits
Step 16: Drybrush Snakebite Leather on shield
Step 17: Highlight drybrush Vomit Brown on shield
Step 18: Highlight drybrush Chainmail on chain mail
Step 19: Drybrush Snot Green on tattered cloth
Step 20: Drybrush Scorpian Green on tattered cloth
Step 21: Highligh drybrush Bilious Green on tattered cloth
Step 22: Use watered down Dark Angels Green on tattered cloth and repeat Step 21 as needed
Step 23: Use Vermin Brown on skin - all around except edges and creases
Step 24: Use Vermin Brown mixed with Leprous Brown to start skin highlights
Step 25: Use Leprous Brown as final skin highlights
Step 26: Use Blood Red on eyeballs
Step 27: Use Chaos Black on pupils
Step 28: Use Skull White within center of pupils
Step 29: Use Codex Grey on bag
Step 30: Use Fortress Grey as highlight on bag
Step 31: Use Skull White as final highlight on bag
Step 32: Use Chaos Black on sides of base
Step 33: Drybrush Camo Green on base
Step 34: Use Chaos Black on rocks
Step 35: Drybrush rocks with Shadow Grey
Step 36: Drybrush rocks with Space Wolves Grey
Subscribe to:
Posts (Atom)