Showing posts with label Werner Klocke. Show all posts

Monday, November 29, 2021

Reaper Miniatures Devona, Female Wizard - 77036


This is the third of three heroes for our in-home Temple of Elemental Evil reincarnated campaign which has been published by Goodman Games.  As noted in my barbarian post, I'm painting up a barbarian, rogue, and sorcerer.  The sorceress has the blood of a silver dragon, so this mini has "dragon wings" on the back painted silver.

Painting instructions for Devona, Female Wizard (used Reaper paints)...

Step 1: I'm using Stynylrez primer on the bones models - just slop it on and cover everything - it works great!
Step 2: Use Desert Tan on skin
Step 3: Use Elf Flesh on skin highlights
Step 4: Use Mustard Yellow on hair
Step 5: Use Flesh Wash on hair
Step 6: Use mix of Mustard Yellow and Elf Flesh to highlight hair
Step 7: Use Rusty Red on clothing and staff
Step 8: Use Brilliant Red as highlights on clothing and staff
Step 9: Use Dragon Blue on robe
Step 10: Use mix of Dragon Blue and Elf Flesh on robe
Step 11: Use Blue Wash (Vallejo) on robe
Step 12: Use Filigree Silver on cloth "wings", belt, and gloves
Step 13: Use Dragon Black on base
Step 14: Drybrush Cold Grey on base
Step 15: Drybrush Stonewall Grey on base

Kickstarter paint total 164 + 1 Devona, Female Wizard = 165


Monday, November 08, 2021

Reaper Miniatures Deladrin, Female Assassin - 77035


This is the second of three heroes for our in-home Temple of Elemental Evil reincarnated campaign which has been published by Goodman Games.   As noted in my barbarian post, I have a couple minis I'm reusing from another campaign and painting up a barbarian, rogue, and sorcerer.

Painting instructions for Deladrin, Female Assassin (used Reaper paints)...

Step 1: I'm using Stynylrez primer on the bones models - just slop it on and cover everything - it works great!
Step 2: Use Rusty Red on cloak
Step 3: Use Rich Leather on leather bits
Step 4: Use Desert Tan on face
Step 5: Use Dragon Black on hair
Step 6: Use mix of Rusty Red and a drop of Dragon Black as a heavy wash on cloak
Step 7: Repeat step 6 with more Rusty Red until final highlights of pure Rusty Red on cloak
Step 8: Use Vallejo Umber Wash on all leather bits
Step 9: Use Elf Flesh for face highlights
Step 10: Use Vallejo Flesh Wash for face
Step 11: Use Nightsky Blue as highlights on hair
Step 12: Use Pilligree Silver on blades
Step 13: Use Dwarven Gold on blade handles
Step 14: Use Dragon Black on base
Step 15: Drybrush Cold Grey on base
Step 16: Drybrush Stonewall Grey on base

Kickstarter paint total: 163 + 1 Deladrin, Female Assassin = 164


Saturday, May 02, 2020

Reaper Miniatures Lysette, Female Elf - 77076


Sometimes simple is best - we had another D&D home campaign which we started about 3 years ago and my wife was playing an Elven wizard.  Prior to the start, everyone painted their own miniature and this Bones figure from my Kickstarter pile was painted by my wife.  I added the eyes and the bit of white to the gemstone in the staff, but the remainder was all painted by my better half.  :-)   I could do some highlighting and shading, and pick out some details, but this wonderful mini was used well on the battlemat and it looks great as is.

Kickstarter paint total: 136 + 1 Elf Wizard = 137

Thursday, April 30, 2020

Reaper Miniatures Tierdeleira, Dark Elf Cleric - 77122


A quickie from Reaper's Bones lineup - we needed a female Elven Cleric for our family D&D game during the family quarantine and I found this in my never ended pile of unpainted Bones Kickstarter miniatures.  This was a blast to throw some paint on a mini.

Painting instructions for Dark Elf Cleric (used my Vallejo Game Color)...

Step 1:  I'm using Stynylrez primer on the bones models - just slop it on and cover everything - it works great!
Step 2: Use Elf Flesh on face and hands
Step 3: Wash with Flesh Wash
Step 4: Highlight with Elf Flesh
Step 5: Use Gory Red on the leather pants, boots, and top of helmet
Step 6: Use Yellow Olive on cloak
Step 7: Highlight cloak with Cayman Green
Step 8: Use Leather Brown on mace handle
Step 9: Use Dead White on shield and helmet
Step 10: Wash white with Pale Grey wash
Step 11: Use Bloody Red on hair
Step 12: Use Hot Orange on hair
Step 13: Use Orange Fire on hair
Step 14: Use Gold Yellow on hair
Step 15: Use Chainmail Silver on mace and edge of sheild
Step 16: Use Black on base and rock
Step 17: Drybrush Cold Grey on rock
Step 18: Drybrush Stonewall Grey on rock

Kickstarter paint total: 135 + 1 Elf Cleric = 136

Saturday, November 17, 2018

Reaper Miniatures Dain Deepaxe - 77074


Back to the bones pile.  Needed a dwarf fighter/cleric with a lot of weapons for a character in a current campaign and this one fit the bill perfectly.  I love the models that have all the exploration and adventuring bits.  This model has backpack, sleeping bag, warhammer, sword, shield, helmet and even a good dwarven mug - he has it all going on!

The shield bit was a fun bit of role playing - as he takes damage there is a color that appears on the shield representing that damage type and in the future he receives resistance - so that's why the funky colors on the shield.  He took cold (light blue), fire (red), acid (green), and radiant damage (yellow) in the game sessions.

This is a bones model out of the kickstarter pile - so up goes the count...

Kickstarter paint total: 119 + 1 Dwarf = 120

Friday, May 25, 2018

Reaper Miniatures Shaeress, Dark Elf Queen - 77066


This is an interesting example for those questioning the detail level of the bones material versus the detail available from a metal model.  Many times they're close enough - particularly the bigger the model, but if you compare the bones 77066 with the metal 3361on the Reaper site you can see the intricate detail of the "armor" on this figure - Derek Schubert really knocks it out of the park with his painting of the dark queen.  As the detail just wasn't there on this bones model, I went in a completely different direction of turning the entire outfit into a red dress and going for the pale china doll look instead.  She'll be an evil blood red vampire queen instead.

Painting instructions for Shaeress...

Step 1: Undercoat model with Stynylrez green primer (this is awesome on bones)
Step 2: Use Caucasian Flesh on skin
Step 3: Use Scarlett Red on dress and sleaves
Step 4: Use Beasty Brown on hair
Step 5: Use Maiden Flesh as highlight on skin
Step 6: Use Bloody Red as highlight on dress and sleaves
Step 7: Use Devlan Mud as wash on hair
Step 8: Use Plague Brown as highlight on hair
Step 9: Drybrush Cold Grey on base
Step 10: Drybrush Stonewall Grey on base
Step 11: Drybrush Skull White on base
Step 12: Use Black on base

Kickstarter paint total: 102 + 1 Shaeress = 103

Wednesday, April 25, 2018

Reaper Miniatures Silver Anniversary Shadow Box - 1600-1611

Something a little different... the year 2017 was the 25th anniversary of Reaper Miniatures and they produced a special edition black and silver blister pack which included a unique model each month.  You could only purchase the model during the given month of production or it was a freebie by purchasing a $40+ order directly from Reaper.

Reaper Miniatures is one of my favorite companies - they make fantastic models, they're innovative, and they're a small American manufacturer (located just north of Dallas, TX) which appeals to my roots as an industrial technologist who has implemented manufacturing and distribution systems in small to mid-size companies.  In late February I had the opportunity to visit the factory and received the visitor tour - it was fantastic and I highly recommend everyone interested in the hobby to take time to do so - particularly if you make it out to Reapercon - something else I finally did as well - I'll have another post regarding those two sometime soon.

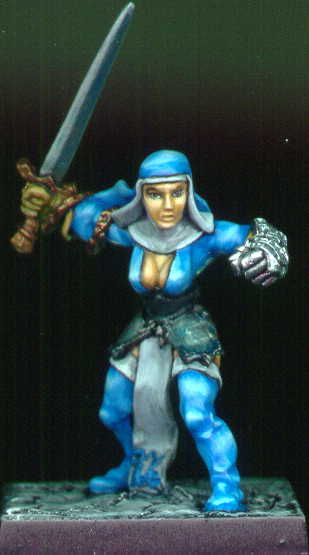
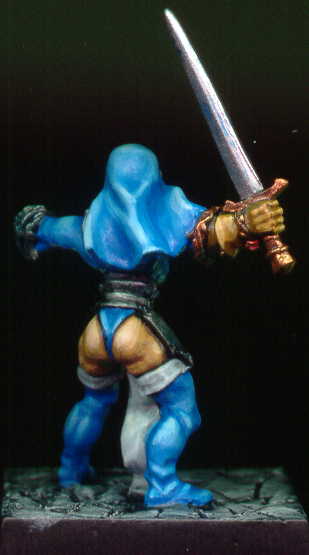
The company was just getting going as I started in the miniature painting hobby back in 1999 and my first actually painted Reaper miniature was Briana of the Blade back in November 2000 (I did a re-base and touchup in November 2013).  A quick run through Reaper's historical highlights...

* 1994 - officially started by making a line called Scrye Counters which were circular in nature and had a piece which floated on top of a base which had numbers - the top piece could be moved to keep track of points when playing collectible card games.

* 1996 - the launch of their Dark Heaven Legends line of miniatures - this is their main product line and is famous for the cauliflower/broccoli integrated base.  The best part of this basing system is that the base sits into a one-inch square and the mini's feet sit at the same height as the top of the square base.

* 2002 - introduction of the Warlord miniatures and skirmish game - these miniatures use the slotta base approach with a plastic base.  The plastic base dictates the skirmish ruling for movement and melee.  I have the second edition rulebook and do wish they'd re-visit this line.

* 2004 - release of their Master Series paint line which is sold in bottles.  Prior to MSP, they did have a paint line that was pretty good which came in little cups with twist on/off caps.   Back in the early 2000's I did a painting class for kids and purchased a bunch of prior paints - not as convenient as the dropper style nor quite as good.  I've recently jumped onto the MSP paint line and I'm quite pleased.

* 2008 - partnership with Paizo to produce Pathfinder official miniatures - based like the Warlord line using the plastic slotta base.  My beef with this line is the larger models are slotted on 40mm Warlord bases instead of a proper 2" square base.  The models themselves are gorgeous!

* 2012 - Bones kickstarter campaign - wildly successful they reached $3.4 million to move into a new line of plastics made out of a soft pvc material called bones.  I bought into that campaign and I'm still painting bones today.

* 2013 - Bones II kickstarter campaign - the fun continued with $3.1 million in funding to move more models over to bones.  I bought into that campaign as well.

* 2015 - Bones III kickstarter campaign - more bones goodies with $2.7 million in funding to continue the migration over to bones.  Another campaign which I supported.

* 2017 - Bones 4 kickstarter campaign - the most recent campaign which procured $3 million in funding and is currently in the production phase.  And yes, supported and will probably purchase more in the not too distant future.  On-track to ship in February 2019.

Somewhere in there was CAV which is their fighting robots game; pre-painted miniatures which I'm guessing started their treck down the bones line as they're made out of the same material; Chronoscope which is their potluck of anything cuthulu, victorian, or sci-fi; and prior to bones, there was a move to P-65 heavy metal which went back to a lead based metal as the price of tin was skyrocketing.  It also let them reduce pricing on bigger models - I loved this metal mixture - fantastic detail and easy to manipulate - still have a number of models in blisters.  Just don't eat it!

This posting is supposed to be about a shadow box... I collected each month's special edition miniature and displayed them on the shelf.  The blister packs are an awesome black with silver Reaper logo and glowing red eyes.  Too cool to simply open up and throw away.  So I went over to Hobby Lobby and bought myself a shadow box - something I have no experience with doing.

I purchased a 16" x 20" box with black backing and black wood trim. Opening the box I found out that I had some work to do.  The glass needed cleaning on both the outside and the inside.  Additionally, the felt inside the box was full of fuzz and particles.  I used the hand attachment on our vacuum cleaner and gave that a good cleaning.

Then I laid out the models in a 4x3 matrix.  It worked rather well as there was about an inch and a quarter border all the way around.  The models would sit nicely with just a bit of spacing.  I had about a centimeter of play in-between (yes, I'm mixing my standard with my metric - but it worked).

I had purchased Gorilla Glue double-sided mounting tape.  They claim to permanently bond pretty much anything to anything within 15 pounds.  I also used one of the given pins on each blister just to make sure. :-)  I laid out the four corner models first and then used a steel rule to place the outside blisters into an orderly fashion.  The two remaining middle blisters I gave it the old eyeball look but was able to use the natural lines of the blister pack name to line them up appropriately.


After that, it was just a matter of sealing it up, give it a final dusting, and hanging the box up on the wall.  I'm quite pleased with my project.  It's a really cool addition to the home office where I work and hobby.  I have it hanging next to the flatscreen tv and the corner shelving unit.


Friday, November 29, 2013

Reaper's Eli Quicknight - 2425


Welcome to Black Friday!  I did my annual mecca to Best Buy in order to oogle at various electronic devices and to get a feel for the latest trends - I'm really impressed with two - the all-in-one pc is back, but this time it really works as it's a flat touch-screen with wireless keyboard and mouse (I'm not into the metro design or whatever Microsoft is calling it these days, but I think it works well on these new devices) - the second trend that impressed me was the boom to wireless speakers with wifi control (fifteen years ago I had a set of Bose speakers ceiling mounted professionally in the main tv room with wires running to the central controls - an expense no longer necessary).  There's a third trend and I think next year it will really take off, everything attached to wifi with the ability to control all devices via the web or your smartphone.  After a bit of browsing, I picked up a couple cheap movies and then hurried home to paint.

I thought about tackling my prepped Kickstarter goblins, but I decided as I had the afternoon/evening to myself that I'd crank out a complete miniature - so back to the good old metal and the figure Eli Quicknight from Reaper Miniatures.

Painting instructions for Eli Quicknight:

Step 01: Undercoat model with black primer
Step 02: Use Dark Angels Green on shirt and pants
Step 03: Use mix of Chaos Black and Scab Red on cloak
Step 04: Use Bronzed Flesh on face and hands
Step 05: Use Sepia ink watered down on face and hands
Step 06: Highlight face and hands with Bronzed Flesh
Step 07: Use Scorched Brown on leather armor and boots
Step 08: Use Leprous Brown on leather belt straps and rope
Step 09: Use Sepia ink watered down on leather belt straps
Step 10: Further highlight face and hands with Elf Flesh
Step 11: Final highlight of face and hands with Pallid Flesh
Step 12: Use Snot Green as initial highlights on shirt and pants
Step 13: Use Scorpion Green as final highlights on shirt and pants
Step 14: Use Bestial Brown as highlights on leather armor and boots
Step 15: Use Snakebite Leather as final highlights on leather armor and boots
Step 16: Drybrush Bleached Bone on rope
Step 17: Use Enchanted Blue on liquid vial
Step 18: Highlight liquid vial with Lightning Blue
Step 19: Final highlights on liquid vial with Ice Blue
Step 20: Use Scab Red on cloak
Step 21: Use Red Gore on cloak for highlights
Step 22: Use Blood Red on cloak for final highlights
Step 23: Use Bronze on sword handles and cloak pin
Step 24: Use Gunmetal on swords
Step 25: Drybrush Codex Grey on base
Step 26: Drybrush Fortress Grey on base
Step 27: Drybrush Skull White on base
Step 28: Clean up sides of base with Chaos Black

Saturday, August 03, 2013

Reaper's Dwarf Warrior - 77011


Another Reaper Bones model - sculpting was done by Werner Klocke  - and he's a pretty good size for a dwarf - definitely fills the role as the big time warrior or even the king.  This is a model was pre-Kickstarter and I purchased new in package at my local gaming store for $1.99.  It's the same model as the Legendary Encounters pre-painted figure 20034 sold for $4.99 and matches up with the Warlord model 14146 for $6.49 in metal.

This figure does very well in its Bones incarnation - the detail works quite well all the way around - about the only area of issue was the little bit of mail on the front.  I based him on a plastic base from Fortress Figures - see my other post on square 1" plastic bases from Fortress Figures - they're really going to be useful when I get through my Kickstarter models.

The miniature was painted from a black undercoat.  Unfortunately I didn't really keep track of the painting process on this one as it's a Bones model and now that there's a few hundred minis sitting on my desk... I've been trying to paint to a really good tabletop standard, but at the same time be quick (quick for me anyways).  I used the layering techniques - so the red beard was done red gore, blood red, blazing orange - the coat was scorched brown, bestial brown, vermin brown, and then bleached bone.

Saturday, November 20, 2010

Reaper's Kiri, Female Ninja - 2534


Completed a miniature that I had started quite a long time ago. I had painted the skin tones and basecoated the clothing - then it sat for a long, long time - several years actually. Until now - I had a bit of inspiration - grabbed the color wheel and instead of two-color red/green I decided on a tri-color red/blue/yellow - the blue I worked into the ribbons and the yellow I used on the hair to great affect.

Painting Instructions for Kiri, Female Ninja:
Step 01: Undercoat model with black primer
Step 02: Use Dark Flesh on skin
Step 03: Add bit of Elf Flesh to Dark Flesh and build highlights on skin
Step 04: Continue adding Elf Flesh to mix until final highlight on skin
Step 05: Use Red Gore on clothes
Step 06: Use Blood Red on clothes for highlights
Step 07: Use Blazing Orange on clothes as final highlight
Step 08: Use Shadow Grey on cloth armor
Step 09: Use Space Wolves Grey on cloth armor for puffies
Step 10: Use Ghostly Grey on puffies as highlight
Step 11: Use Regal Blue on ribbons
Step 12: Use Enchanted Blue on ribbons as highlights
Step 13: Use Lighting Blue on ribbons as final highlights
Step 14: Use Scorched Brown on all leather armor, straps, and boots
Step 15: Use Bestial Brown on all leather armor, straps, and boots
Step 16: Use Snakebite Leather on all leather armor, straps, and boots
Step 17: Use Bubonic Brown on all leather armor, straps, and boots
Step 18: Use Lightning Blue on bottles
Step 19: Use Ice Blue as liquid in bottles
Step 20: Use Bad Moon Yellow on hair
Step 21: Add Skull White to Bad Moon Yellow and build highlights on hair
Step 22: Use Boltgun Metal on metal bits
Step 23: Wash metal bits with Devlan Mud
Step 24: Use Chainmail on metal bits as highlight
Step 25: Drybrush Codex Grey on stone
Step 26: Drybrush Fortress Grey on stone as highlights
Step 27: Drybrush Skull White on stone as final highlights

Friday, January 30, 2004

Reaper's Mother Hilda - 2418


Another fun model for the gaming group. Completed over a two night stint with a couple hours each night - she really came together quickly.

Finished January 2004.

Painting Instructions for Mother Hilda
Step 01: Undercoat model with black primer
Step 02: Use Boltgun Metal on armor and axe
Step 03: Use Chainmail on armor and axe
Step 04: Use a wash of Sky Blue Ink on armor and axe
Step 05: Use Mithril Silver for highlights on armor and axe
Step 06: Use Shining Gold on runes and patterns
Step 07: Use Space Wolves Grey on hood and top of boots / trim
Step 08: Use wash of Black Ink on hood and top of boots / trim
Step 09: Use Space Wolves Grey to highlight hood and top of boots / trim
Step 10: Use Skull White for final highlight on hood and top of boots / trim
Step 11: Use mix of Dark Flesh and Bronzed Flesh on skin
Step 12: Use Bronzed Flesh on skin
Step 13: Use Elf Flesh on skin
Step 14: Use Pallid Flesh on skin
Step 15: Use mix of Chaos Black and Codex Grey on clothing
Step 16: Use another drop of Codex Grey to mix on clothing
Step 17: Use a drop of Fortress Grey to mix on clothing
Step 18: Use Scorched Brown on wood shaft
Step 19: Use Bestial Brown on wood shaft
Step 20: Use Vomit Brown on wood shaft
Step 21: Use Snakebite Leather on handle
Step 22: Use Bleached Bone on handle
Step 23: Use wash of Chestnut Ink on shaft
Step 24: Drybrush Codex Grey on base
Step 25: Drybrush Fortress Grey on base
Step 26: Drybrush Skull White on base

Sunday, January 18, 2004

Reaper's Sister Candice, Battle Nun - 2403


Every now and then something comes out a bit better than expected and I think this was one of them. Originally starting off as an experiment using Vallejo brand paints (the blue and white). The end result I'm quite pleased with - time was good as well - about 5 hours.

Painting Instructions for Reaper Miniature's Sister Candice, Battle Nun:
Step 01: Undercoat model with black primer
Step 02: Use Vallejo Magic Blue on clothing
Step 03: Use mix of Vallejo Magic Blue and Vallejo Skull White on clothing
Step 04: Continue to add more Vallejo Skull White to mix and repeat
Step 05: Use Space Wolves Grey on hood and top of boots
Step 06: Use careful wash of Black Ink on hood and top of boots
Step 07: Use Space Wolved Grey to re-hight hood and top of boots
Step 08: Use Skull White for final highlight on hood and top of boots
Step 09: Use mix of Dark Flesh and Bronzed Flesh on skin
Step 10: Use Bronzed Flesh on skin
Step 11: Use Elf Flesh on skin
Step 12: Use Pallid Flesh on skin
Step 13: Use Snakebite Leather on the gloves
Step 14: Use Vomit Brown on the gloves
Step 15: Use Botlgun Metal on armor
Step 16: Use Chainmail on armor
Step 17: Use a wash of Sky Blue Ink on armor
Step 18: Use Mithril Silver on armor
Step 19: Use Dwarf Bronze on sword handle and chain
Step 20: Use a wash of Chestnut Ink on sword handle and chain
Step 21: Use Dwarf Bronze on sword handle and chain for highlights
Step 22: Drybrush Codex Grey on base
Step 23: Drybrush Fortress Grey on base
Step 24: Drybrush Skull White on base

Wednesday, August 27, 2003

Reaper's Assassin, Blue Orchid - 2588


Assassin, Blue Orchid should be renamed Purple People Eater! I wanted something dark and the deep purple with black leather armor fit the picture in my mind. This figure was done to gaming standards for my local rpg group.

Painting Instructions for Reaper Miniature's Purple People Eater:
Step 01: Undercoat model with black primer
Step 02: Use Chaos Black and Liche Purple mix as basecoat on cloak
Step 03: Add more Liche Purple to mix on cloak
Step 04: Use Imperial Purple on cloak
Step 05: Use Warlock Purple for highlights on cloak
Step 06: Use Tentacle Pink as final highlights on cloak
Step 07: Use mix of Chaos Black and Codex Grey to highlight leather
Step 08: Use Codex Grey as final highlight on leather
Step 09: Use Boltgun metal on metal studs, bits, and swords
Step 10: Use Mithril Silver for highlights on swords
Step 11: Use Ice Blue on bottle
Step 12: Use Chaos Black on sides of base and rocks
Step 13: Drybrush Codex Grey on rocks
Step 14: Drybrush Fortress Grey on rocks
Step 15: Drybrush Skull White on rocks