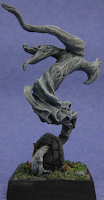
Here's the traditional side views...


More Bones! Gotta love them Bones by Reaper - this is my second test model (first was the ghost) with the new plastic Bones from Reaper. Again, I placed him on a plastic base from Fortress Figures. These figures look great - forget about the mold line - just go with it - paint 'em up and play with the 'em. This is the second Bones figure I cranked out on the same day. I named him Sir Jacks as a tribute to one of my favorite sculptors - Bobby Jackson and yes, this is one of his sculpts
I used Vallejo game color paints directly without a primer - unlike the Reaper paint (I only have one bottle of the Reaper paints - Clouded Sea - which I used on the ghost), any significant watering down of the paint caused it to run and not stick to the plastic. However, I had heard when doing some research that using it full strength out of the bottle worked very well. Indeed - ditto the same results - full strength without dilution (or very minor - just a wet brush - enough to make it flow) worked very well. Again, I banged and bounced the mini around while and after painting with no ill effect to the paintjob - like the ghost, I did hit it up with a very light coat of dull coat just to take the shine off the surface.
Painting Instructions for Male Human Warrior:
Step 01: Use Chaos Black on all armored areas
Step 02: Use Regal Blue on robe
Step 03: Use Scab Red on shield face
Step 04: Use Scorched Brown on leather and back of shield
Step 05: Drybrush Boltgun Metal on all armored areas
Step 06: Drybrush Chainmail highlights on all armored areas
Step 07: Use Enchanted Blue as highlights on robe
Step 08: Use Lightning Blue as final highlights on robe
Step 09: Use Bestial Brown as highlights on leather
Step 10: Use Bubonic Brown as final highlights on leather
Step 11: Use Bubonic Brown as wooden planks on back of shield
Step 12: Use Bestial Brown to fill in wooden planks on back of shield
Step 13: Use Blood Red on top half of shield
Step 14: Use Space Wolves Gray on shield/shirt pattern
Step 15: Use Skull White as highlights for shield/shirt pattern
Step 16: Use Dwarf Bronze on sword handle
Step 17: Drybrush Codex Grey on base
Step 18: Drybrush Fortress Grey on base
Step 19: Drybrush final highlight Skull White on base


