When I started this crazy hobby of ours back in 1999, there wasn't much in the way of resources outside of Games Workshop published material, but the internet was starting to take off and a local group formed which we called dcareaminipainters. While monthly meets were at a local game store we also used an internet group messaging service (bought out by Yahoo) to communicate. Eventually there became a larger national and then international internet group on Yahoo and that's where I bumped into Dr. Faust and his minipainting website called the PaintingClinic.
The PaintingClinic quickly became a go to resource for me and over the years I've referenced back numerous times. Eventually he started a YouTube channel and has now abandoned the website altogether which he explains why in this video here (an excellent little history lesson by the way on the beginnings of using the internet for group collaboration as well as a bit of a tirade on internet trolls and life lessons - I found it all interesting).
Every now and then I get an update of the latest videos from channels which I've set as a favorite - I've viewed a few of PaintingClinics videos but those viewings have been few and far between as they've been mostly sci-fi material or armies - neither of which I'm much interested in. However, within the last month he's been on a Dungeons and Dragons kick and painting singular minis for his gaming sessions - that's awesome!
While I explain my style of painting as a "layering" approach and I write up the steps/paint in each layer within my blog posts; the PaintingClinic videos SHOW you exactly what it means to use the layering method as well as a glaze to blend the layers together. These are some fantastic videos and I want to give a shout out to some really cool stuff - the benefits of layering is you get 90% of a fully blended look with 20% of the effort - most of his work is within a 2 hour time period.
As of this blog post - here are the videos...
Reaper Ranger Part One
Reaper Ranger Part Two
Reaper Dr. Orontius Part One
Reaper Dr. Orontius Part Two
Reaper Bones Ogre Part One
Reaper Bones Ogre Part Two
Reaper Bones Hell Hound
Ral Partha Copper Dragon Part One
Ral Partha Copper Dragon Part Two
I highly recommend taking the time to watch these videos. They're all very nicely done (even have a professional feel to them) and last about fifteen minutes each on average.
Showing posts with label Ral Partha. Show all posts
Showing posts with label Ral Partha. Show all posts
Wednesday, November 05, 2014

Tuesday, November 07, 2006
Ral Partha's (Iron Wind Metals) Aerial Servant w/Pizza
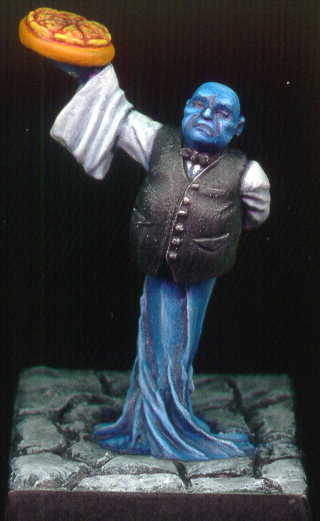
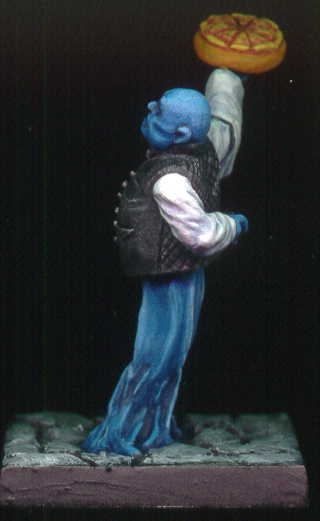
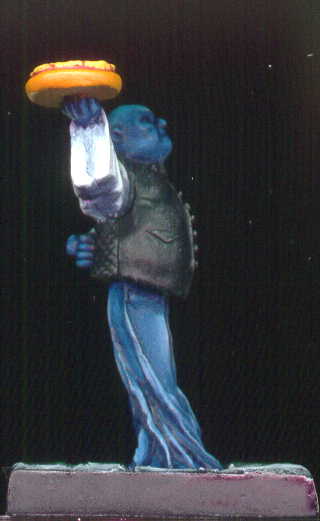
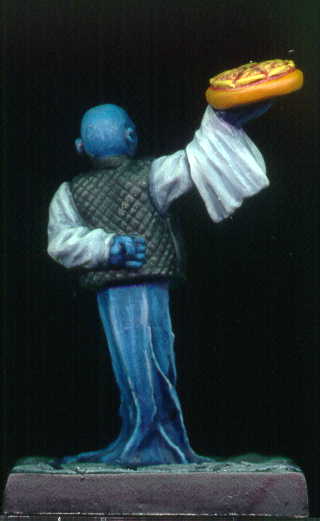
I started this miniature in hopes that I would finish in time for the Ral Partha (miniature molds now owned by Iron Wind Metals) painting contest. The contest was to paint any Ral Partha figure in their very long history (the history of Ral Partha goes back to I believe the 80's). I have a couple and the aerial servant was one that I thought would be fun to paint. Unfortunately the due date was the end of October and I didn't have time to complete the miniature until this weekend.
Painting Instructions for Aerial Servant w/Pizza
Step 01: Undercoat model with black primer
Step 02: Use Regal Blue as a base coat on everything except vest
Step 03: Use light coat of Shadow Grey to highlight shirt and towel
Step 04: Add Skull White to the Shadow Grey and continue highlights
Step 05: Use Leprous Brown on the pizza and stone plate
Step 06: Use watered down Red Gore on pizza slices
Step 07: Use mix of Leprous Brown and Skull White on pizza crust
Step 08: Use mix of Regal Blue and Skull White to highlight air and face
Step 09: Add Skull White to mix and continue highlights
Step 10: Drybrush Skull White on tuxedo for highlights
Step 11: Use a wash of Chaos Black on tuxedo (except for buttons)
Step 12: Drybrush Codex Grey on rocks
Step 13: Drybrush Fortress Grey on rocks
Step 14: Drybrush Skull White on rocks
Thursday, July 10, 2003
Ral Partha's Hamatula - 11-645
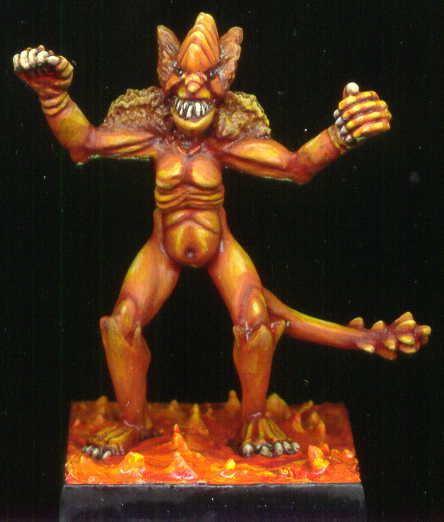

This figure is an AD&D 2nd Edition miniature from Ral Partha. This figure was painted as a study in red. To see what would happen and the characteristics of going from a deep red to a whitish yellow.
Painting Instructions for Ral Partha's Hamatula:
Step 01: Undercoat model with black primer
Step 02: Use Scab Red on skin
Step 03: Use Red Gore on skin
Step 04: Use Blood Red on skin
Step 05: Use Blazing Orange on skin
Step 06: Use Fiery Orange on skin
Step 07: Use Golden Yellow on skin
Step 08: Use Bad Moon Yellow on skin
Step 09: Use Skull White with a dab of Bad Moon Yellow on skin
Step 10: Use Vomit Brown on nails and teeth
Step 11: Use Flesh Wash between grooves of nails and teeth
Step 12: Use Bleached Bone on nails and teeth
Step 13: Use Skull White on nails and teeth
Step 14: Use Bad Moon Yellow on base
Step 15: Wash Fiery Orange on base
Step 16: Wash Blood Red on base
Step 17: Wash Scab Red on base
Tuesday, May 14, 2002
Ral Partha's Brown Thief

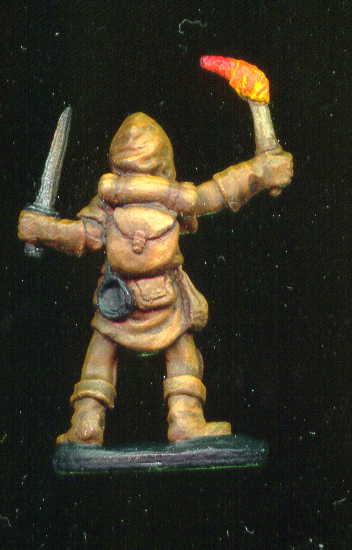
This figure is an archived miniature from Ral Partha circa 1984. I don't know much more about it other than that.
I have had this model sitting around staring at me on the table for awhile.
Every time it just kept saying brown. When I had some extra brown left over from another model I just went to town. My goal was to create "color" using various shades of brown. I kept highlighting or darkening my main color accordingly. My attempt at this was purely academic and the light source was the torch instead of the typical overhead lighting. Therefore the model should give a feeling of the yellow/red torch casting it's glow across the model.
I tried something else too that didn't quite work. When finished, I used a yellow/orange wash on the brown highlights to try and create a glow from the torch affect. It seemed to only dull the highlights down and therefore didn't really work as desired although if you look closely at the highlights you should be able to see the yellow/orange tint. I just thought it would be more profound of an affect.
Finished in May 2002.
Saturday, January 27, 2001
Ral Partha's Archers of Lanis


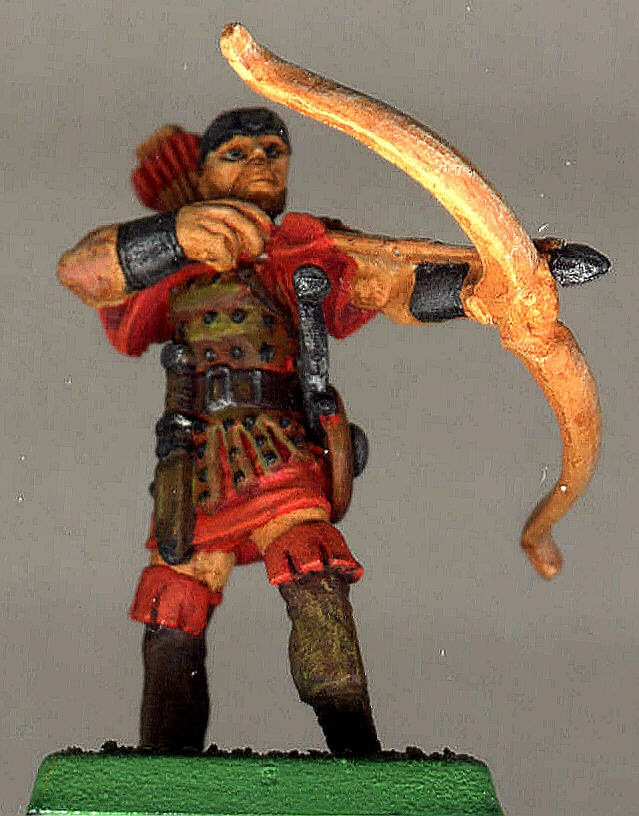

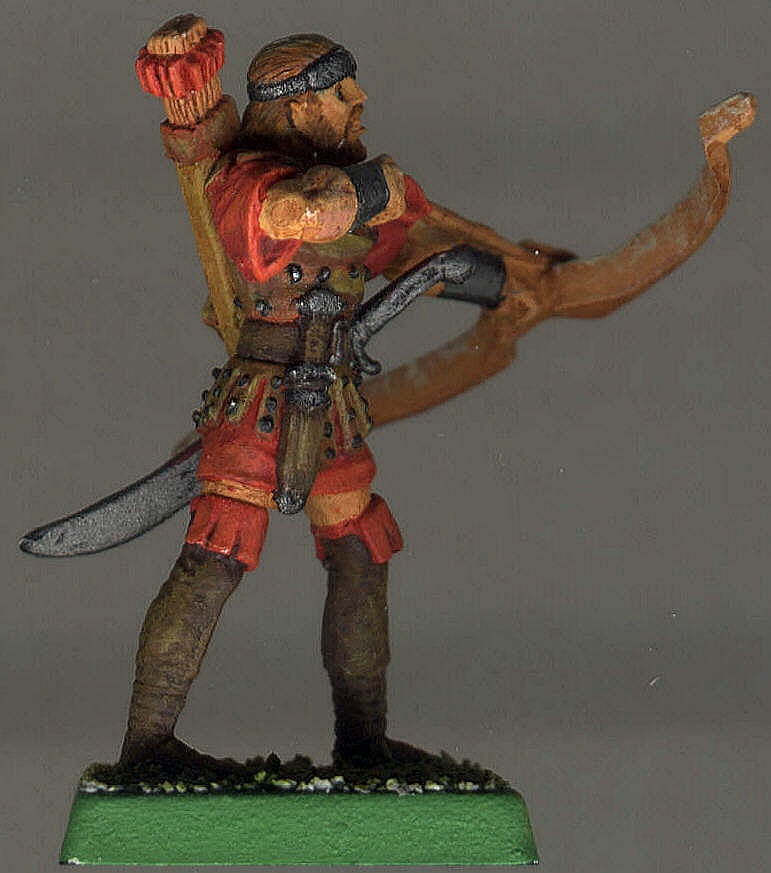
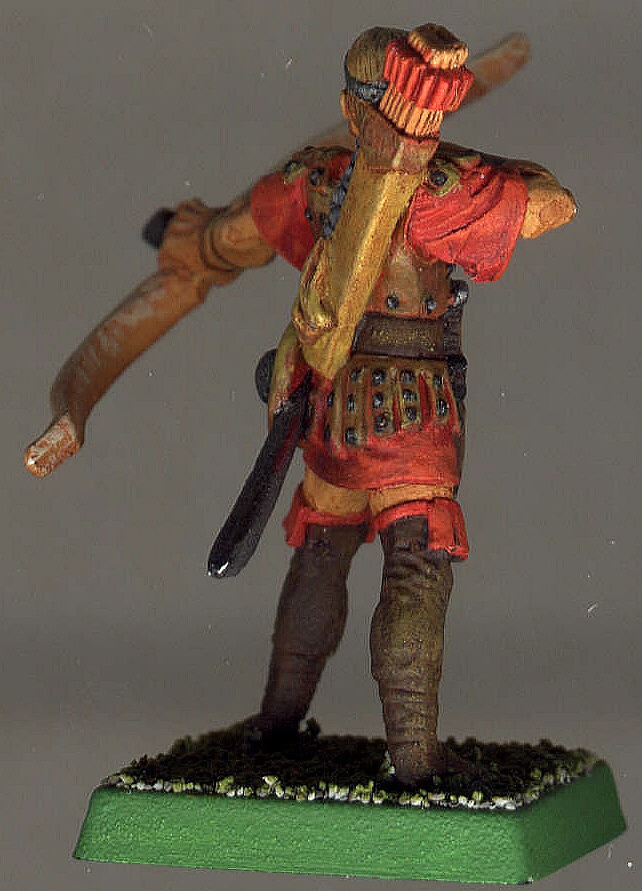
Crucible was the new fantasy tabletop game developed by Ral Partha. At the time of the painting contest conclusion it is unknown as to the status of Ral Partha and the Crucible game - very sad indeed. I finished these two figures at the end of January of 2001.
These scans are a bit different than the others I've done previously. Upon recommendation from others I have placed a box over the figure instead of a cloth. This helps eliminate the shadows. However I used the WarHammer box lid and probably need to find something that isn't so deep as the scans are a bit dark.
I'm very happy with the figures themselves. I probably should have put a darker wash into the arrow shafts. Favorite part is the stud detail - took a long time and a steady hand.
Painting Instructions for Archers of Lanis
Step 1: Use Bronzed Flesh on skin
Step 2: Use Blood Red on all leather and garments
Step 3: Use Snakebite Leather on leather armor, hair, and eye socket
Step 4: Use Scorched Brown on leather boots and belt
Step 4: Use Chaos Black on metal
Step 5: Use Vomit Brown on bow
Step 6: Use Bubonic Brown on quiver
Step 7: Use a watered down Flesh Wash over everything
Step 8: Drybrush Boltgun Metal on metal
Step 9: Shadow Bestial Brown on leather
Step 10: Shadow Red Gore on garments
Step 11: Highlight/drybrush Bleached Bone on bow
Step 12: Use Bleached Bone on eyes
Step 13: Highlight skin with Bronzed Flesh then highlight that with Elf Flesh
Step 14: Highlight leather with Bubonic Brown
Step 15: Highlight garment with Blazing Orange
Step 16: Highlight boots and belt with Bestial Brown
Step 17: Drybrush Snakebite Leather on boots and belt
Step 18: Use Codex Grey on braids
Step 19: Watered down Chaos Black into braid
Step 20: Drybrush Fortress Grey on braids
Thursday, January 18, 2001
Ral Partha's Ogre Ballista


Crucible is the new fantasy tabletop game developed by Ral Partha. In order to get into the spirit, they decided to have an on-line painting contest. I painted this ogre in January of 2001.
You can see mine and many others at the Crucible painting contest web site hosted by the Goblin King.
This miniature was quite large - I did not realize how large it was until I had it in my hands. I thought this figure was rather cool as it had some very nice features.
I did my first bit of terrain - the "rock" is made out of styrofoam which I painted black, two shades of grey and then a final drybrushing of white. Finally, I let some of the grass grow on the rock in the grooves. I like the end result.
Painting Instructions for Ogre Ballista
Step 1: Use Snakebite Leather on all leather armor
Step 2: Use Bronzed Flesh on skin
Step 3: Use Chaos Black as an undercoat on all metal bits
Step 4: Use Regal Blue on all cloth and arrow feathers
Step 5: Use Scorched Brown on ballista
Step 6: Use Bubonic Brown on arrows
Step 7: Drybrush Boltgun Metal on metal bits
Step 8: Drybrush Chainmail on metal bits
Step 9: Drybrush Mithril Silver on metal bits very lightly as a highlight
Step 10: Shade all metal bits with watered down Flesh Wash
Step 11: Wash all cloth with watered down Midnight Blue
Step 12: Highlight all cloth with Ultramarines Blue
Step 13: Drybrush all cloth with Lightning Blue
Step 14: Wash all skin with watered down Flesh Wash
Step 15: Shade skin with Dwarf Flesh - slighty watered down
Step 16: Highlight skin with Elf Flesh
Step 17: Wash all leather with Bestial Brown
Step 18: Highlight Balista with Bestial Brown
Step 19: Drybrush Snakebite Leather on balista
Step 20: Light drybrush Bubonic Brown on balista
Step 21: Highlight all leather with Bubonic Brown
Step 22: Light drybrush Bleached Bone onto leather edges
Step 23: Use Bleached Bone on fingernails and toe claws
Step 24: Use Goblin Green on base
Step 25: Drybrush base with Camo Green
Friday, August 04, 2000
Ral Partha's Neo-Soviet Ursa Heavy Assault Suit


The first VIC (Visions In Color) that I participated in was for VIC#3. I painted this mech in August of 2000.
The idea of a VIC is that everyone paints the same model and then we all present at the same time. You can see mine and many others at the miniature painting web site hosted by Dominic.
This was the first time that I have ever tried to paint something that was this large. It was quite a challenge.
While the pictures are OK - I had to use my wife's digital camera and the images lost alot of their color (the shading and highlighting).
Subscribe to:
Posts (Atom)