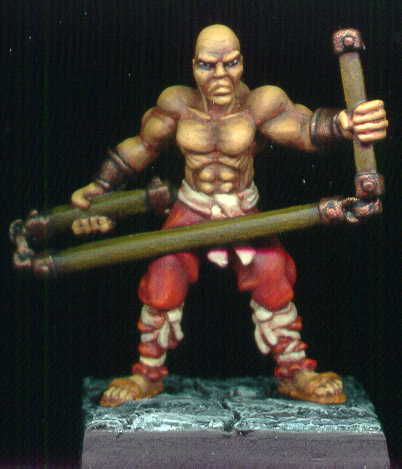
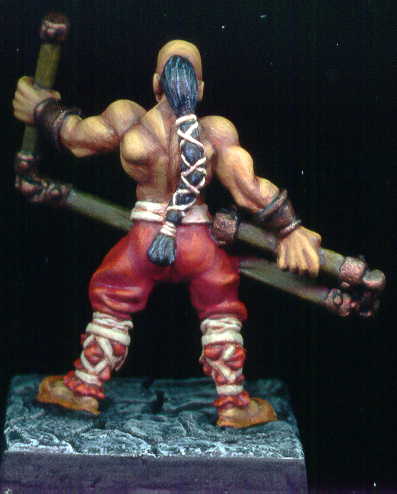
Many months have passed since the paints have been opened. Painted the monk during a break from "honey do" chores during Thanksgiving weekend. Not bad! Do to the weapon I only scanned front and rear. Finished in November 2004.
Painting Instructions for Monk
Step 01: Use Dark Elf Flesh - watered down - on skin
Step 02: Add a bit of Bronzed Flesh - on skin
Step 03: Add a bit more Bronzed Flesh - on skin
Step 04: Add a bit of Elf Flesh - on skin
Step 05: Use Chaos Black on hair and metal bits
Step 06: Use Scab Red on pants
Step 07: Wash belt and lacings with Dark Flesh
Step 08: Use a mix of Bleached Bone with the wash of Dark Flesh on belt and lacings
Step 09: Use Bleached Bone as highlight on belt and lacings
Step 10: Use Pallid Flesh as final highlight on belt and lacings
Step 11: Use Red Gore and Blood Red mix on pants
Step 12: Highlight pants with Blood Red
Step 13: Final highlight using Blazing Orange
Step 14: Use Scorched Brown on weapon
Step 15: Wet drybrush Snakebite Leather on weapon
Step 16: Vermin Brown on sandals
Step 17: Add a little Bleached Bone for highlight on sandals
Step 18: Use Beaten Copper on metal bits
Step 19: Drybrush Shadow Grey on hair
Step 20: Drybrush Codex Grey on stone
Step 21: Drybrush Fortress Grey on stone
Step 22: Drybrush Skull White on stone